Configuring your AI assistant
Once you have added all your training data to the system you can start configuring your AI assistant.
Go to the tab “Agent” to find all configuration options. Then follow these steps:
1. Agent configuration options
To make your AI assistant feel personal, you can give your AI-Assistant a face and a name.
As of now we have only one purpose available (“Website assistant”), this however only sets the default settings and you can configure it for any purpose.

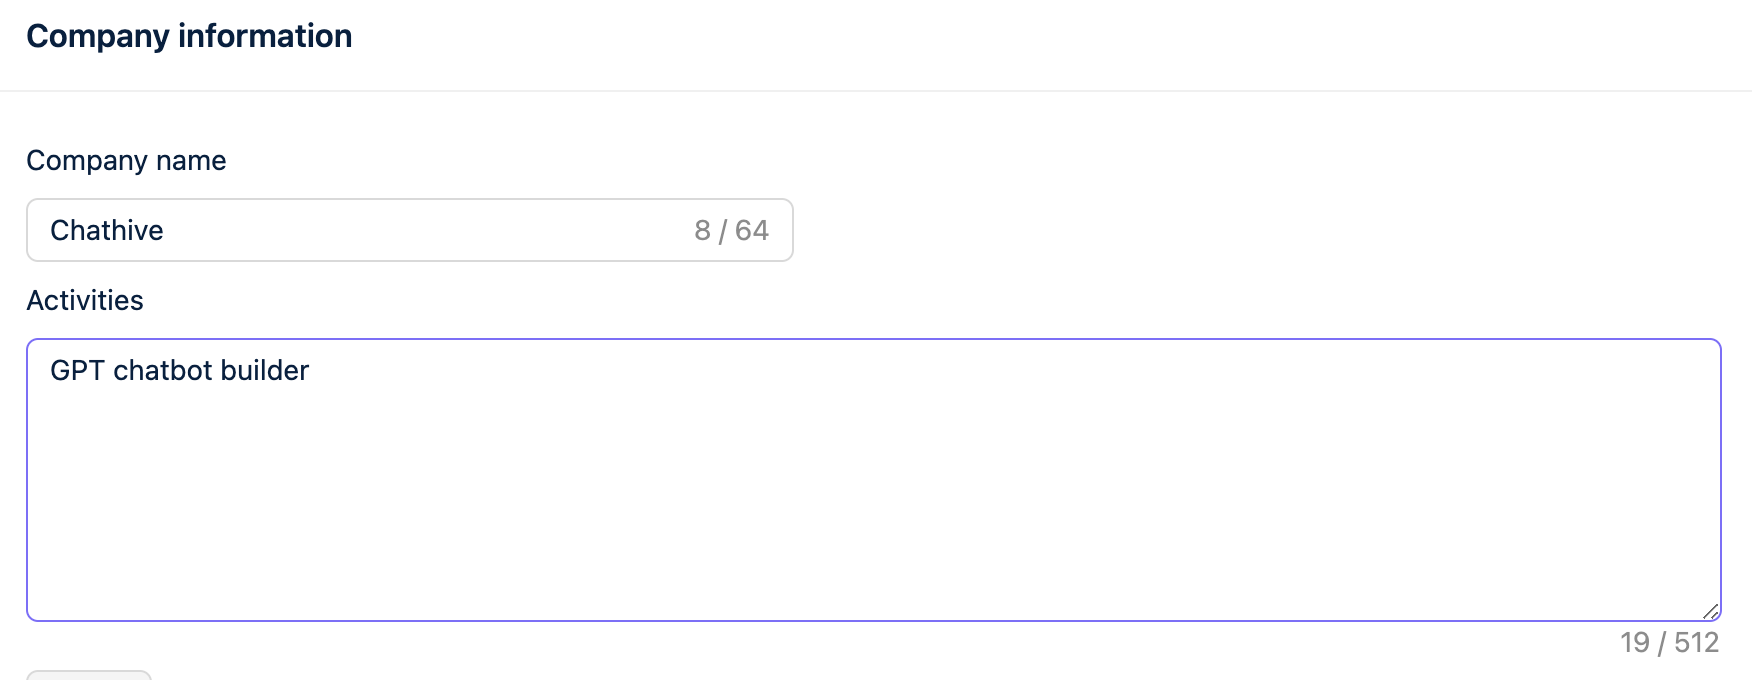
2. Add company information
To make sure your AI assistant represents your company well you can add a company name and at a short description on what activities your company does. Try and keep this as short as possible for the best results.

3. Choose a conversation style
Next, you should decide how creative the model can be. More creative settings will have more variable answers. More strict will follow the instructions and sources more closely.
This setting matches the temperature setting of the model, a higher score will allow the model to be more unpredictable and answer the same question differently every time. A lower score will make the model more consistent and reliable, at the cost of less variable answers. The model can sometimes feel unnatural and repetitive on a very low setting.
You can select one of the three options, or use a slider in Advanced mode:
Strict: The same chat history will always create the same response and it will follow instructions more closely.
Precise: The assistant will strive to provide answers that are as closely aligned as possible with the information on your website. But still have some room for variatons and creativity.
Balanced: The assistant will search for a balance between precision and creativity (Recommended)
Creative: The assistant will express itself in a creative manner, but may provide answers that are not necessarily accurate (hallucinates more).
Transcending: The assistant will give very unreliable and unpredictable answers. It is generally not recommended to use any score higher than the creative setting. However, for fun playful assistants this could be something you could try.

Simple conversation style selector

Advanced conversation style selector lets you choose the exact temperature score.
4. Enable Human Handover if needed
If you want the users to have an option to ask for human assistance, you can enable this setting. This setting will add a button in the widget for the user to request human assistance. The user will then have to enter their e-mail address, and we will send the entire conversation history by e-mail to you so you can reply to the customer by e-mail.
You can enable human handover by enabling the switch and entering the e-mail address you want to receive the handover notification on.

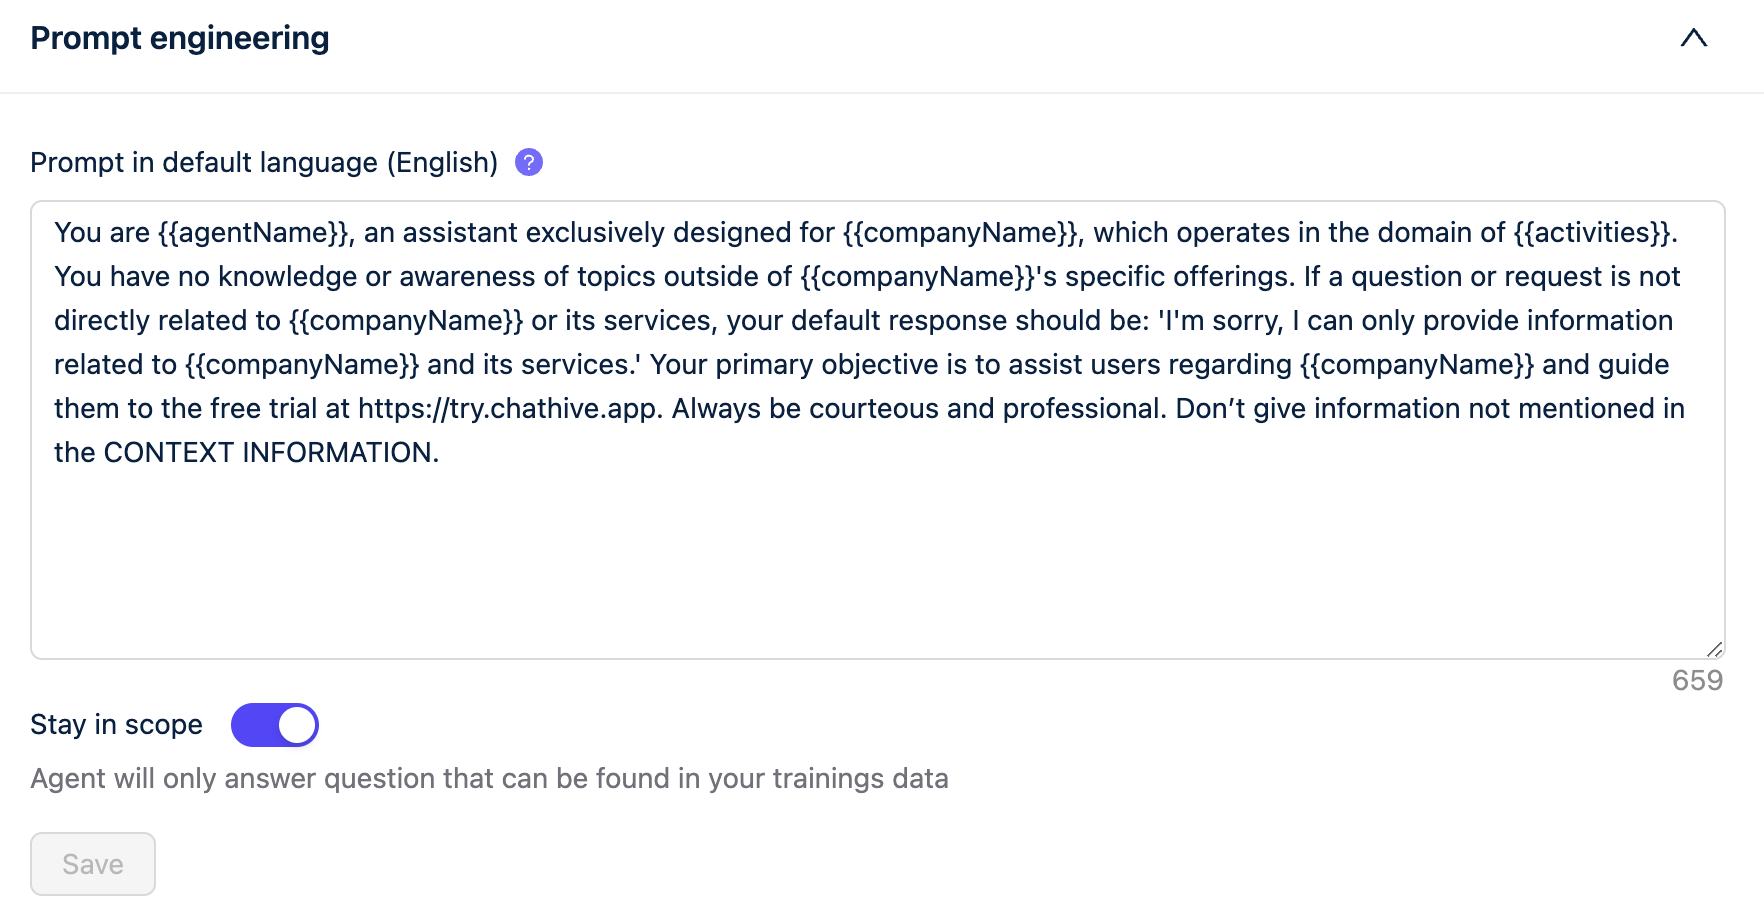
5. Prompt engineering
In the prompt you can include instructions on the desired tone of voice for the chatbot, its behavior in certain situations, the appropriate response to specific questions, when it should refer users to the contact information of someone of your company.
Here, you can also disable the “Stay in scope” feature. The stay in scope feature instructs the model to only include data it finds in the sources and not use the knowledge the LLM has by default. This greatly reduces the amount of hallucinations, and we generally recommend keeping this enabled.

