
AI-forms
AI Forms are an innovative tool that reimagines traditional workflows. Without requiring technical expertise, users can create automated, customized processes. This tool enables you to collect data and dynamically configure questions, while built-in AI offers additional support. These AI flows can personalize classic workflows and also allow you to create your own flows. You can create questionnaires for:
Introductory meetings.
Deciding between sole proprietorship or partnership.
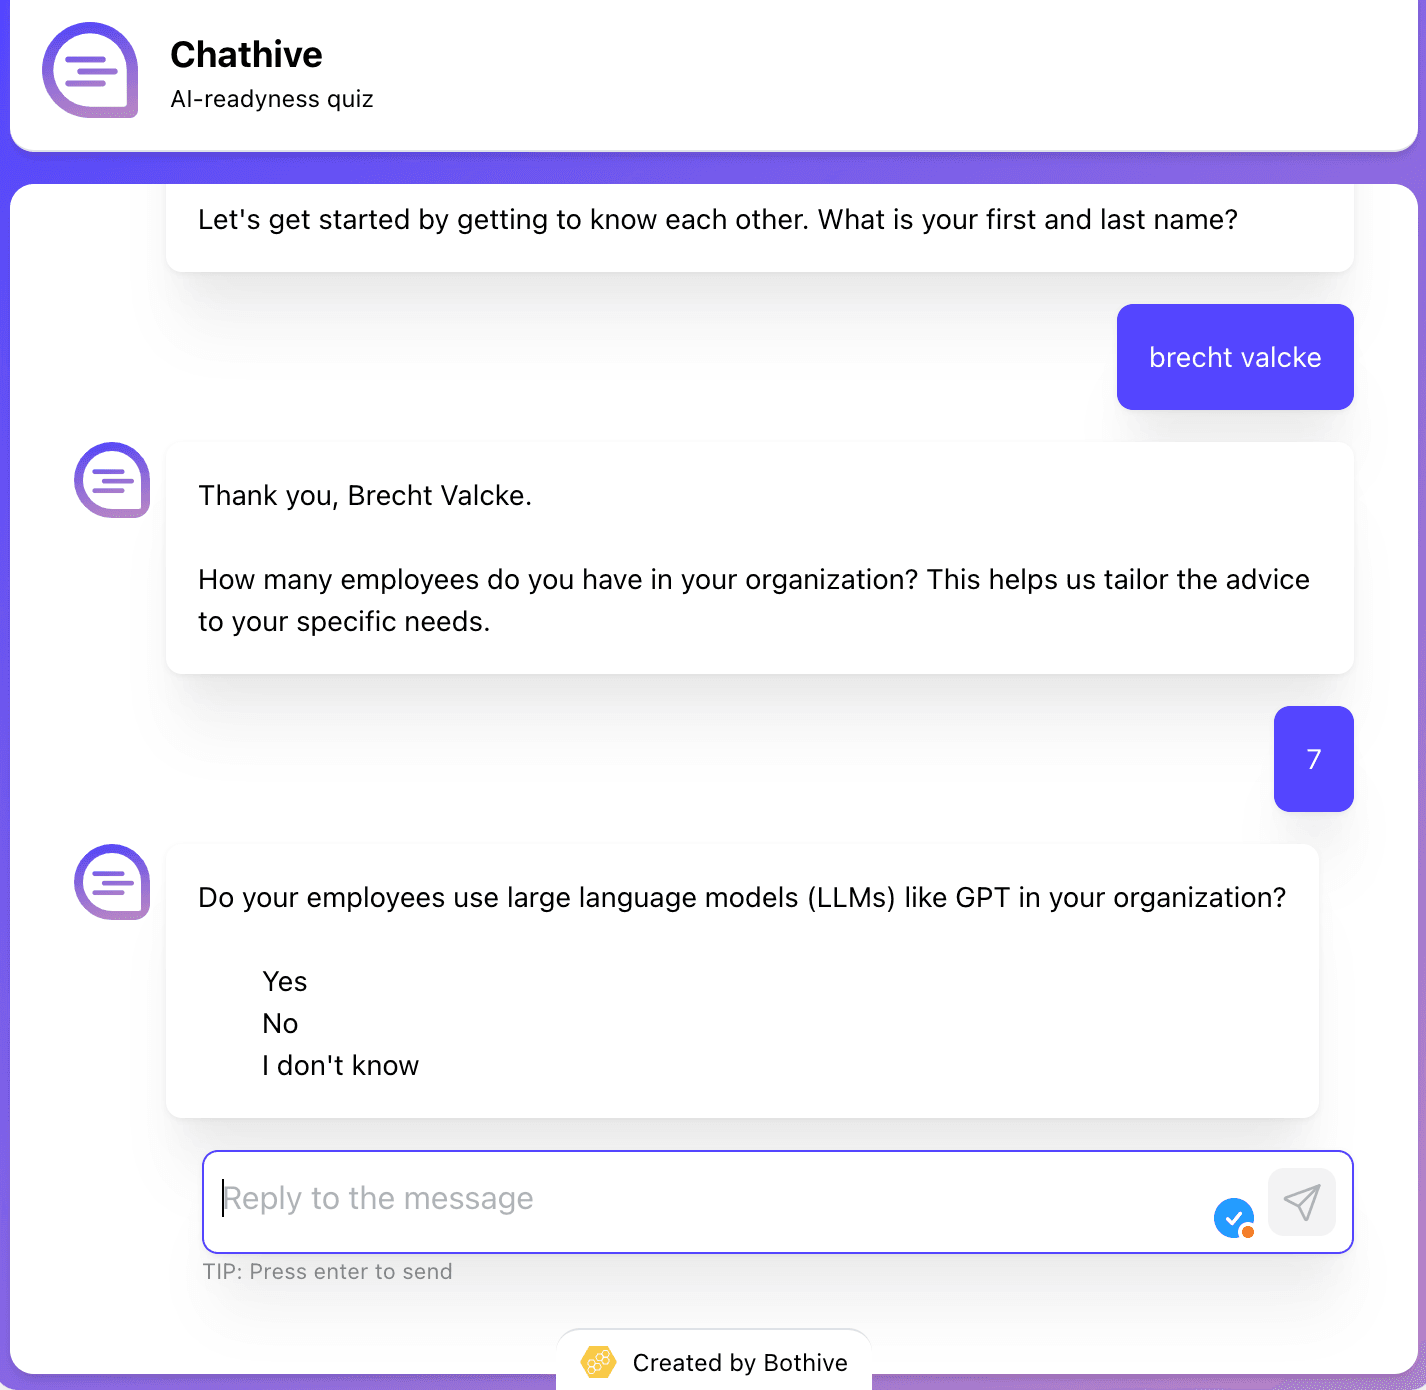
Inquiries like “Are you AI-ready?”, with the AI assistant generating a report at the end.
Any other processes requiring repeated data collection.
Step-by-Step Guide to Creating an AI Form
Step 1: Create a Project
Follow these steps to create an AI Form project in ChatHive:
Open the Projects Overview
In the left menu, click on Projects to access your project overview.
Can’t see the projects overview?
You might be inside a specific project. Click the arrow next to the project name at the top to return to the main menu and access "Projects."
Click "Add Project"
In the top-right corner of the screen, click the Add Project button. A popup will appear to fill in your new project details.Set the Project as AI Form
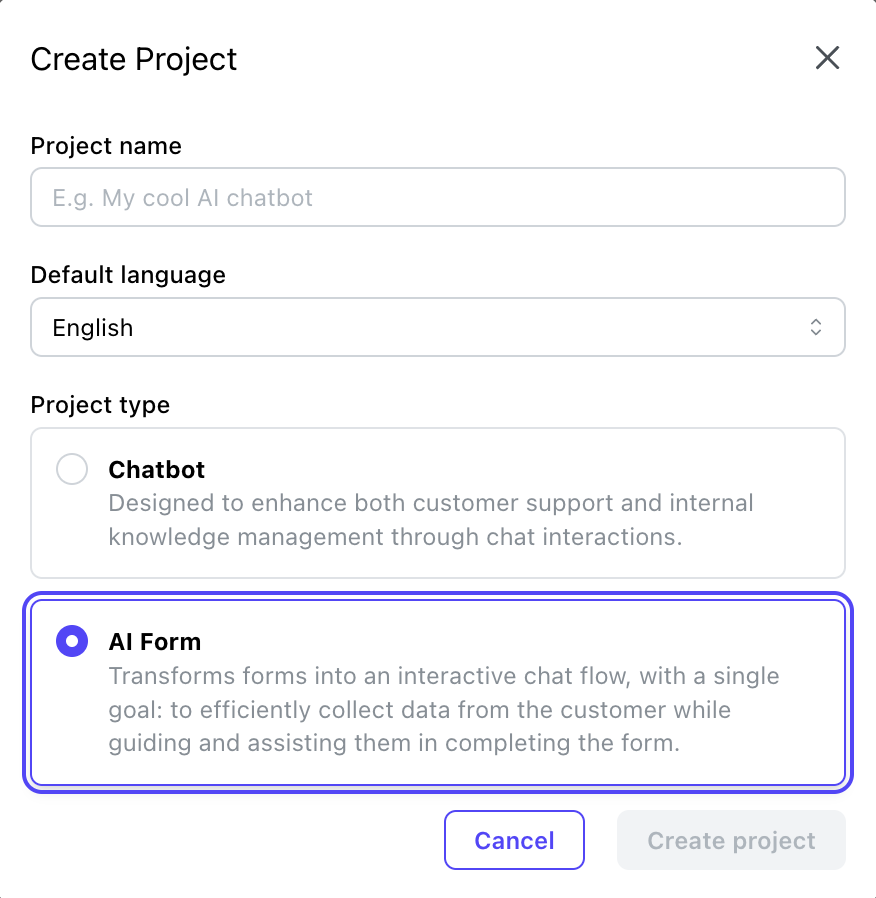
In the popup, provide the following information:
Project Name: Name your project, e.g., "My AI Questionnaire."
Default Language: Choose the default language, e.g., Dutch.
Project Type: Select AI Form.
Confirm Your Choices
Double-check the details and click Create Project to finalize. Your new AI Form project will now appear in the project overview, ready for further customization!
Step 2: Add Training Data
After creating your project, you’ll automatically be directed to the screen for adding training data. Adding data to your knowledge base is easy and efficient. You can add four types of data by default:
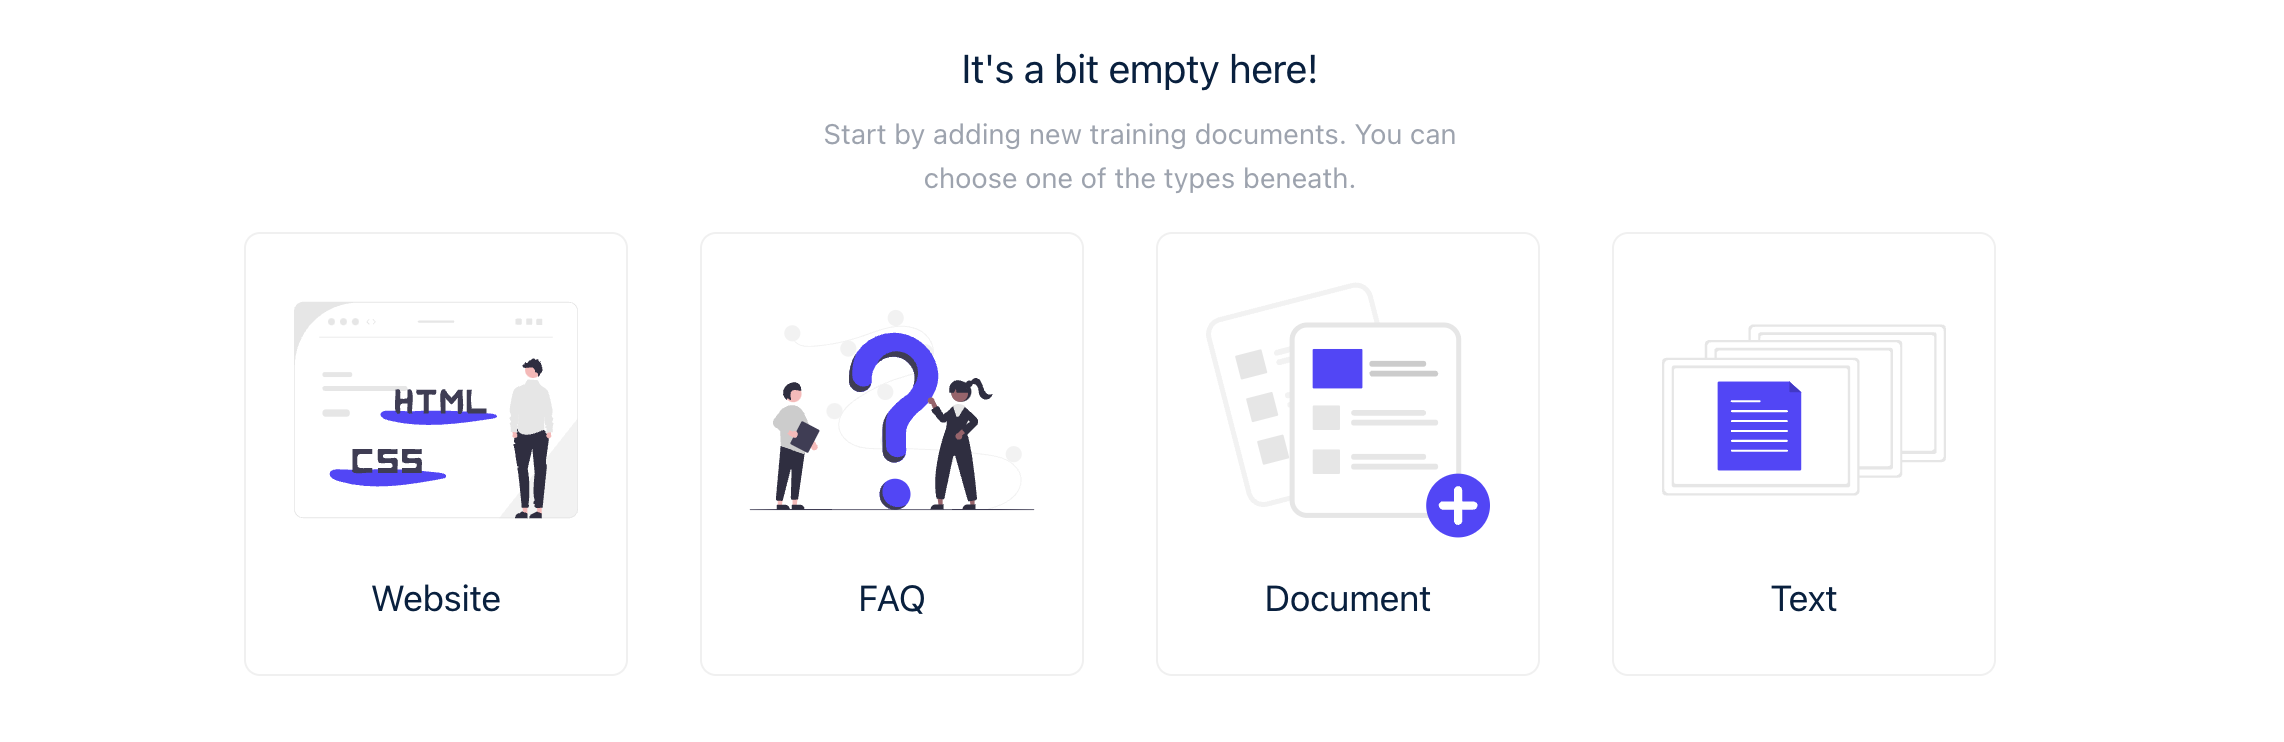
Websites:
Click the "Add training document" button.
In the pop-up window, select "Website."In the "URL" field, enter the link to the website you want to use.
Click "Add" to add the link. The platform will crawl the website and use its content for training purposes.
Our web crawler will then get to work. It may take a few minutes before you see the pages appear.
Good to know: The crawler in Chathive not only scans the specified URL but also all linked pages that share the same URL structure. Here are some examples to clarify this:
Example 1: Entire website
Entered URL: https://example.com
Result: The crawler retrieves all pages linked to this main domain, such as:
https://example.com/pagehttps://example.com/folder/subfolder/.../page
Example 2: Specific folder
Entered URL: https://example.com/folder
Result: Only pages within this specific folder structure are included, such as:
https://example.com/folder/subpage
FAQs:
Click "Add Training Document" and choose "FAQ."
Enter the question and corresponding answer.
Set Priority and specify the Document Date and language.
Click Add to save the FAQ.
Documents:
Click "Add Training Document" and choose "Text."
Provide a title, enter the content, and set the priority, date, and language.
Text Files:
Supported formats include Word, Excel, PowerPoint, PDF, Markdown, and rich text.
Upload files, name them clearly, set priority and relevance, and specify the language.
Tip: Ensure all added content is relevant to your chatbot's training requirements. Respect copyright laws for all materials used.
Step 3: Adjust Behavior
Make your AI Form as personal as possible by customizing its behavior:
Welcome Message
In the Welcome Message section, you can customize your welcome message and the start button. This allows you to ensure that the GPT assistant provides the customer with a brief explanation about the purpose of this AI form.
Configuration
In the Configuration section, you can guide the assistant's behavior more specifically. There are three different fields available for this purpose:
Describe your form: Provide some context for your assistant here. Explain its purpose and why the information is needed.
Fields: Specify the information the assistant should collect. This can be done in two ways:
Provide a specific question, such as "What is your first name?"
Simply give a term for the field, such as first name.
Rules: Define specific rules for the AI to follow. These can range from simple instructions, like "Always ask questions X and Y together, but save them separately", to more complex rules, such as "If the answer to field X is 'A', then do not ask field Y."
Suggestions
The AI assistant can provide suggestions for each question. These suggestions can be toggled on or off using a switch and can be further refined through rules. These rules function similarly to the ones in the Configuration section.
Conversation style
Next, you need to determine how creative the model is allowed to be. More creative settings result in more varied responses, while stricter settings ensure the model adheres more closely to instructions and sources
This setting corresponds to the model's "temperature" parameter. A higher score makes the model less predictable, allowing it to answer the same question differently each time. A lower score makes the model more consistent and reliable, but at the cost of reduced variation in responses. At very low settings, the model may sometimes feel unnatural and repetitive.
You can choose one of three options or use a slider in Advanced mode:
Strict: The same chat history always produces the same response and the assistant strictly follows instructions.
Precise: The assistant aims to provide answers that align as closely as possible with the information on your website. This allows for some variation and creativity.
Balanced (Recommended): The assistant seeks a balance between precision and creativity.
Creative: The assistant expresses itself in a more creative way. However, responses may occasionally be incorrect (higher chance of hallucinations).
Transcending: The assistant generates highly unreliable and unpredictable answers. This is generally not recommended for use above the Creative setting. However, this can be experimented with for fun or playful assistants.
Step 4: Customize Layout
Match your AI Form with your brand identity:
Assistant persona
To give your AI assistant a personal touch, you can assign it a name and a face.
Languages
Expand your assistant's language capabilities by adding more languages and adjusting the text to fit your widget. Choose a default language by clicking on the star icon. This will be the language your assistant uses to communicate if the language of the website cannot be detected. Only one default language can be set.
Make sure that the languages you want to set are also configured in the Tab Settings.
Branding
Customize your widget to perfectly match your brand identity. In the Tab Branding section, you have full control over the widget's appearance. Choose your brand colors for the font and background, or add your own CSS code to customize every aspect, from fonts to backgrounds and more.
Step 5: Test Your AI Form
Everything is set up and your form is ready! Before you launch it to the world, it's important to test your form to ensure it's working properly. You can do this in two ways:
In Form Config, you can test the AI form by clicking the start button on the left. This will only test the content, and you won’t be able to check the layout.
In the Share tab, you can generate a link that you can either send out or copy to visit the form directly.
Step 6: Go Live
To share your flow, you can either send the link directly to your customers, or you can follow the steps in the Implementation tab to embed it on your website.
Use Case Examples
Gathering Customer Information:
Use forms for client onboarding, data collection for financial plans, and more.Guiding Customers with Steps:
Create workflows like:A Peppol assistant generating a personalized plan based on client input.
Assisting entrepreneurs with legal and administrative tasks.